Showing posts with label Blogger tips. Show all posts

Friday, February 1, 2013

How Web Designer Can Make Money ?


If you are web designer then you need to earn money smartly.There are many writer and company who are hiring web designer to design there website layout, but this is not only way by which you can earn money if you are best designer on web then you should now some tactics by which you can earn lot of money from it.In this post I will share lot of tricks with you by which you can earn 100000/year only if you are great web designer :D

Find yourself a client


There are many website online who are giving jobs to web designer elance is one of them, Elance is providing over 800,000 new jobs posted by clients every year.If you are having talent then go toelance.com and sign up (It's Free)

Launch Blog About Web Design


There are lot of web designer having there own blog.You can write web designing tutorials on your blog and you can also sell your products eBook.If your blog is having lot of traffic then you can convert taffic into money by placing ads on your blog.

Some Blog by Web designer-


Become an author


Becoming an author and writing tutorials on web designing tricks and tips for other site can help yout o earn money easily. PsdTuts is pay $150 per tutorial they accept.You just need to write a good quality tutorial on web designing and submit it.

Affiliate Marketing


Suggest your client once done with project management to host a web or to help them setting hosting through your referral link such as in DreamHost.comCrucialWebHost.com, in turn enjoy the percentage of their money for long term.

Design Themes For ThemeForest


If you are web designer then you can easily design WordPress themes or blogger templates,Just design you themes and submit it to themeforest if they accept your theme then they will sell your theme and give you commission.

Read More...

Sunday, January 27, 2013

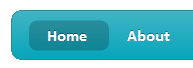
Fancy CSS3 & jQuery Lavalamp Menu For Blogger


You can use this menu in 6 colors by just changing a word in the HTML code.This menu is designed by Insidesigns and I have bloggerized it to works perfectly with any blogger blog.Now lets go to the tutorial and see how to add this menu to blogger blog.

How To Add This Menu TO Blogger?

For easy understanding I am dividing the tutorial in three parts & they are as below,
  1. Adding Scripts
  2. Adding  Styles
  3. Adding The Menu

1. Adding Scripts

  1. Go to Blogger Dashboard > Template
  2. Click on Edit HTML
  3. Hit Proceed
  4. Find below code in your template

</head>

add below code just above it,(If you have already added a jQuery library to your blog then delete the highlighted code)

<script src="http://ajax.googleapis.com/ajax/libs/jquery/1.7.2/jquery.min.js" type="text/javascript"></script>
<script src="http://code.helperblogger.com/lavalamp-menu.js" type="text/javascript"></script>

2. Adding Styles


Now find below code,

]]></b:skin>


add below CSS code immediately before it,

/*LAVALAMP MENU BY http://www.styleupyourblog.blogspot.com/ START*/

.lavalamp {
    position: relative;
    border: 1px solid #d6d6d6;
    background: #fff;
    padding: 15px;
    -webkit-box-shadow: 0 3px 6px rgba(0,0,0,.25);
 -moz-box-shadow: 0 3px 6px rgba(0,0,0,.25);
    border-radius : 10px;
    -moz-border-radius : 10px;
    -webkit-border-radius : 10px;
    background : -webkit-gradient(linear, left top, left bottom, from(rgb(240,240,240)), to(rgb(204,204,204)));
    background : -moz-gradient(linear, left top, left bottom, from(rgb(240,240,240)), to(rgb(204,204,204)));
 height: 18px;
        font-family: calibri;
}

.magenta {
 background : rgb(190,64,120);
 background : -webkit-gradient(linear, left top, left bottom, from(rgb(190,64,120)), to(rgb(177,24,91)));
 background : -moz-gradient(linear, left top, left bottom, from(rgb(190,64,120)), to(rgb(177,24,91)));
 border: 1px solid #841144;
 
}

.cyan {
 background : rgb(64,181,197);
 background : -webkit-gradient(linear, left top, left bottom, from(rgb(64,181,197)), to(rgb(7,165,187)));
 background : -moz-gradient(linear, left top, left bottom, from(rgb(64,181,197)), to(rgb(7,165,187)));
 border: 1px solid #2f8893;
 
}

.yellow {
 background : rgb(255,199,79);
 background : -webkit-gradient(linear, left top, left bottom, from(rgb(255,199,79)), to(rgb(255,188,43)));
 background : -moz-gradient(linear, left top, left bottom, from(rgb(255,199,79)), to(rgb(255,188,43)));
 border: 1px solid #c08c1f;
 
}

.orange {
 background : rgb(255,133,64);
 background : -webkit-gradient(linear, left top, left bottom, from(rgb(255,133,64)), to(rgb(255,107,24)));
 background : -moz-gradient(linear, left top, left bottom, from(rgb(255,133,64)), to(rgb(255,107,24)));
 border: 1px solid #c04f11;
 
}

.dark {
 background : rgb(89,89,89);
 background : -webkit-gradient(linear, left top, left bottom, from(rgb(89,89,89)), to(rgb(54,54,54)));
 background : -moz-gradient(linear, left top, left bottom, from(rgb(89,89,89)), to(rgb(54,54,54)));
 border: 1px solid #272727;
 
}

.magenta li a , .cyan li a, .yellow li a , .orange li a, .dark li a{
 color: #fff;
 text-shadow: 0 -1px 0 rgba(0,0,0,.40);
 
}

.lavalamp a {
    text-decoration: none;
    color: #262626;
    line-height: 20px;
}

.lavalamp ul {
    margin: 0;
    padding: 0;
    z-index: 300;
    position: absolute;
}

.lavalamp ul li {
    list-style: none;
    float:left;

    text-align: center;
    }

.lavalamp ul li a {
    padding: 0 20px;
    text-align: center;
    }

.floatr {
    position: absolute;
    top: 10px;
    z-index: 50;
    width: 70px;
    height: 30px;
    border-radius : 8px;
    -moz-border-radius : 8px;
    -webkit-border-radius : 8px;
    background : rgba(0,0,0,.20);
    -webkit-transition: all .4s ease-in-out;
    -moz-transition: all .4s ease-in-out;
}

/*LAVALAMP MENU BY http://www.styleupyourblog.blogspot.com/ END*/


Now save your template.

3. Adding The Menu


Now come to Page Layout

  • Now come to Page Layout
  • Click on Add a Gadget (Below Header)
  • Choose HTML/JavaScript
  • Copy and paste below code inside it,

<div class="lavalamp dark">
 <ul>
  <li class="active"><a href="">Home</a></li>
  <li><a href="#">About</a></li>
  <li><a href="#">Blog</a></li>
  <li><a href="#">Services</a></li>
  <li><a href="#">Portfolio</a></li>
  <li><a href="#">Contacts</a></li>
  <li><a href="#">Back to Article</a></li>
  <li><<a href="#">How it Works?</a></li>
 </ul>
 <div class="floatr"></div>
</div>

  • Replace # with the links
  • Replace Home,About,Blog. etc. with your link text which you want to appear on the menu.
  • If you want to change background color of the menu then replace <div class="lavalamp dark"> with one of the code below.


<div class="lavalamp">
<div class="lavalamp magenta">
<div class="lavalamp cyan">
<div class="lavalamp yellow">
<div class="lavalamp orange">
<div class="lavalamp dark">

Finally save your widget and you are done.
Read More...

Coll JavaScript Image Slider For Blogger


Today I am sharing another cool slider which works with JavaScript and no jQuery and flash is needed.This slider contains a ribbon at the left top corner of slider and it is named as "What's Hot" also it contains a beautiful slice effect which slices image into 12 parts,these main features increase beauty of the slider.Another great feature of this slider is it is highly
Read More...

How To Remove Navbar From Blogger


Navbar-Navbar is inbuilt in all blogger templates.Navbar is a bar on top of the blog it has many usefull things like-search,share and follow.

If you want to remove Navbar then there is no potion is there in blogger to remove navbar directly.So how to remove navbar a big question come in our mind.
Read More...

Boost Blog Traffic And Sales Using Facebook


Is investing time and money on Facebook really going to help increase your traffic and sales?

Or is Facebook as a social media marketing leader overrated?

I’m sure these were some of the questions that had come across your mind before, regardless of whether you have used Facebook as a social media marketing platform or not.

Is the ROI really worth the effort we put into Facebook?

Why Facebook Marketing ?


Let’s look at some interesting facts about Facebook as a social media marketing tool.

(1) On Oct 2012, Facebook has reached 1 billion active members. Granted that some of these accounts may be inactive or non-human (eg businesses and pets) or duplicate (with one person having multiple accounts)… still, the number is overwhelming.

(2) More than 50% of its users log on everyday.

(3) The average user spends more than 20 minutes on Facebook daily.

(4) 2 major reasons why users “like” a Facebook brand is because they genuinely like the brand and because they wanted the promotional items or services.

(5) Majority of the brands which used Facebook as a marketing tool, had reported a significant increase in referral traffic and revenue.

And of course…
(6) Facebook is the most popular social media choice ahead of Twitter and LinkedIn.


I’m Convinced. But How Do I Unleash Facebook’s Potential?


There are a few simple ways you can make use of Facebook to give your website a traffic boost or your business’ bottom line a nice improvement. Here’s a list of some of methods that you can implement for your brand.

#1: Network Building
Why many take advantage of Facebook marketing or any social media marketing, is the fact that it easily allows you to build your network. It is essentially your basics for using Facebook as a marketing tool for your blog or business. So, invite all your acquaintances and your customers.
In addition to that, you can also start a group and invite those interested in the same topic or your business to join it. The best part this method offers is it’s free and it’s targeted.

#2: Introduce Yourself to Your Friends and Fans
One of the golden rules of using social media as a marketing tool is to introduce yourself, your blog and your business, whichever relevant. You don’t have to disclose too much personal information if you are not comfortable in doing so but instead, work on building an interesting profile, be it your passion (in what you blog) or your products / services.
People read blogs that they are acquainted with and buy from businesses which they are familiar with. As for the latter, you might even get away with a slightly higher price compared to your competitors. I know for I have seen it happened.

#3: Engage Your Friends and Fans
After all, Facebook is all about social interaction. What’s a better way to interact with your readers and customers than to answer or address their comments, concerns or thoughts?

This does not mean that you need to be on standby on your Facebook account all the while waiting for these comments. I’m pretty sure your readers and customers won’t mind waiting a bit for your answers. However, it is common sense that when you have an active promotion, you should be expecting more comments. The faster you address their queries, the higher your chances are of increasing your traffic and sales, as the promotions are still fresh on their minds.

#4: Upload Images and Videos
Another engaging activity that you are recommended to do is to upload images and videos. It can be pictures related to your post or a video on how to use your products. This proves to be a rather effective way as it stands out among other text posts and updates. Add an interesting caption and you are set to draw in more attention and hence, generate traffic, “likes” and subsequently sales too. 

#5: Don’t Spam
Nobody likes a spammer. So, while you are anxious to see the results from promoting your brand on Facebook, you need to refrain from spamming, whether intentionally or unintentionally. Updating every 10 minutes or posting dozens of posts daily are considered spamming as your friends and fans’ accounts will be filled with your posts and updates to the point that it becomes irritating. When that happens, you are most likely to be blocked from their account.

Having said that, don’t wait till the following month before you post something! You probably have your friends and fans forgetting about your brand.

#6: Apps for Your Facebook Marketing

Check out the following apps and see if you can make use of it in your Facebook account.

ContactMe (http://www.facebook.com/contactforms) – this allows you to add a contact form to your Facebook page. It’s easy to use and be customized.

Ecwid (http://www.ecwid.com/) - this shopping cart is especially for those running a business on Facebook. It is web and mobile optimized which is great, judging by the amount of people assessing their Facebook accounts through mobile devices. It can be integrated with online and offline payment methods like Paypal & Google Wallet and shipping carriers like UPS & FedEx. There are two packages available ie Basic which is free and Silver which has more features and costs $17 per month.

PostPlanner (http://www.postplanner.com/) -this premium app is simple yet effective. It helps you schedule your posts (including images and video, which is not commonly offered by other scheduling apps) to your Facebook page and groups. Great for when you are away from the computer for an extended period or when you want to ensure that your posts be delivered at certain time egduring peak time. Packages start from $4.95 per month.

There you are, some of the simpler and effective ways to give your traffic and sales a boost. I do hope you find them useful. Do you have any other tips on how to do so too? Do share. I would love to read about them.
Read More...

How To Add Social Media Buttons With Css3 Effect To Blogger


Social Media is always helpful to blogger, even one like or share can drive traffic to your blog, you should serve your visitors social sharing and follow us button by which they can stay connected with your blog. If your social sharing option is attractive then user love to share your blog. In this post I will provide you attractive social media follow us button with css3 tooltip effect.


Adding This Widget To Blogger


The steps are extremely straightforward, and would merely take 5 minutes to complete the integration. Just follow the steps as mention below.

  • Step 1: Go to Blogger Dashboard >> Template >> Edit HTML >> Proceed
  • Step 2: Now within the template search for ]]></b:skin> and just above it paste the following Style sheet CSS Code.

.nav-tt{
 padding: 50;
 width: 70%;
 height: 70px;
 margin: 80px auto 30px auto;
}
.nav-tt li{
 float: left;
 list-style: none;
}
.nav-tt li a{
    display: block;
    width: 40px;
    height: 40px;
    margin: 0 2px;
    outline: none;
 position: relative;
 z-index: 2;
    text-indent: -9000px;
    text-decoration: none;
}
.nav-tt li .gplus{
    background: url(https://blogger.googleusercontent.com/img/b/R29vZ2xl/AVvXsEi-vqyM7ezMO6kAbC3ms4fEUVqPwX0iM8Qrlb5Yn5g8cLzozMT4O-S4Judu9KRsPDvHtQxHMnxPo0o-WYjfRqkQA_0ktrjLPWEI7dIK0guYbQQl1yH_hwhVCC58Ms2263Twp0NUfyOH_3z_/s128/google_plus.png) no-repeat;
}
.nav-tt li .twitter{
    background: url(https://blogger.googleusercontent.com/img/b/R29vZ2xl/AVvXsEgQSrpFfPXrYNW32guRteZ61Kz5DJdV-x8iWFsg-gUXqvysTF_zY7KJojdLm0NZe90oMEzlddarh62sWUYyoEPztD8KQXevUgzKhbt5gZc9VJCWsWQPHcPQpt9NsjA_pe9psNBx57EpJs7H/s128/twitter_1.png) no-repeat;
}
.nav-tt li .pinterest{
    background: url(https://blogger.googleusercontent.com/img/b/R29vZ2xl/AVvXsEhXYuJLd_ttZQ5EYGAKryY9b0xPfkSW5Q2b9G6kyUfPgkIM6NJq0-Vn8FUvG50HIQZPee84d1gCEs9xxWDn33mtPm2tuad9KadQuwBeZbDKhRpL7AUSVBE8PFjihqmoKg2hbUEprVfZ_zSo/s128/pinterest.png) no-repeat;
}
.nav-tt li .facebook{
    background: url(https://blogger.googleusercontent.com/img/b/R29vZ2xl/AVvXsEjJyCc4jYBahmelGEitSRmQt2QyuE6W6NDDhIXwynaef9bBzjcZ2vWsp9u1vQPKvCnDHsMFvrtEspA-GA91R5zMGAjlj9KbIY_HZYPlbknbI0564F_7IUE3087Op94gzMbFakd04onC2wai/s128/fb_1.png) no-repeat;
}
.nav-tt li .linkedin{
    background: url(https://blogger.googleusercontent.com/img/b/R29vZ2xl/AVvXsEjT26xhha9-JvozyVBtysqM7DdRA8nAXDpVM8GlII13ZUbydM2nS3oheEF7OK2kse7SQBgbTvewrxE2jWqgAXjIpn4GE6JG8bKR91njps23h6qfWuf6lp6rLEt-6QoUqXr9iy6Pfivr38is/s128/linkedin.png)no-repeat;
}
.nav-tt li .tumblr{
    background: url(https://blogger.googleusercontent.com/img/b/R29vZ2xl/AVvXsEjUQciKfR9po2jCslezhafwhDzNcTeDR2dzMI6-Lm6LYGfVeT5dDbXXrj9WoDn7oK_qQDfAXURDrO1S-RLTzeN4vtLJNFVctNQSnveBzYVInVkFbFaV8O2RDpakzELukNtivSvp8SttYnMz/s128/tumblr.png) no-repeat;
}
.nav-tt li .youtube{
 background: url(https://blogger.googleusercontent.com/img/b/R29vZ2xl/AVvXsEhuCfwWl-Mv4XVLT1uIdPK-5aSwF6IGXoGeDbZcBBUCjWU3XudaXCN3bVXF_ICd_3wWuHK1Uem_4bRcfqiLRkG0cRUkxNaMmAnQOhT9wv85a5Lzy76SwN_1lWROvD3GfgVc4IYshxQCHWRa/s128/you_tube.png) no-repeat;
}
.nav-tt li .mail{
 background: url(https://blogger.googleusercontent.com/img/b/R29vZ2xl/AVvXsEgTaF8L5KMYCSOfsUSkVBAujg_jhNrrhW9sd8cfQr8fQPD3GUanoPRTT7bJ14RmKJJXaOh1BUlMX9OnK21LW2JupcY4ha265AzktujA54eUtLJdwfvRugh5gxA-vKRTI3CmHdNDIINkzW5g/s32/email.png) no-repeat;
}
.nav-tt li .rss{
 background: url(https://blogger.googleusercontent.com/img/b/R29vZ2xl/AVvXsEi53P3hyphenhyphen4kwzJrg7adJa1AtLzOxs_dugNaSUFz82aJECZZuqmHIldBlrGNXkpajN9POpswjA8OMBU1k2egLW4UeD4g3nFKnK6mPnd3H_3pnhb8naCSq_CfH4TU004uvXhsPTAJNracgw3uX/s128/rss.png) no-repeat;
}
.nav-tt li a span{
 width: 80px;
 height: 80px;
 line-height: 80px;
 padding: 10px;
 left: 50%;
 margin-left: -60px;
 font-family: 'Alegreya SC', Georgia, serif;
 font-weight: 400;
 font-style: italic;
 font-size: 14px;
 color: #719DAB;
 text-shadow: 1px 1px 1px rgba(0, 0, 0, 0.1);
 text-align: center;
 border: 5px solid #ffffff;
 background: rgba(255,255,255,0.5);
 text-indent: 0px;
 position: absolute;
 pointer-events: none;
 border-radius: 50%;
 bottom: -40px;
 opacity: 0;
 box-shadow: 0px 0px 10px 0px rgba(0,0,0,0.1);
 -webkit-transform: scale(0);
 -moz-transform: scale(0);
 -o-transform: scale(0);
 -ms-transform: scale(0);
 transform: scale(0);
 -webkit-transition: all 0.3s ease-in-out;
 -moz-transition: all 0.3s ease-in-out;
 -o-transition: all 0.3s ease-in-out;
 -ms-transition: all 0.3s ease-in-out;
 transition: all 0.3s ease-in-out;
}
.nav-tt li a span:before,
.nav-tt li a span:after{
 content: '';
 position: absolute;
 bottom: -15px;
 left: 50%;
 margin-left: -9px;
 width: 0;
 height: 0;
 border-left: 10px solid transparent;
 border-right: 10px solid transparent;
 border-top: 11px solid rgba(0,0,0,0.1);
}
.nav-tt li a span:after{
 bottom: -13px;
 margin-left: -10px;
 border-top: 10px solid #ffffff;
}
.nav-tt li a:hover span{
 opacity: 0.9;
 bottom: 50px;
 -webkit-transform: scale(1);
 -moz-transform: scale(1);
 -o-transform: scale(1);
 -ms-transform: scale(1);
 transform: scale(1);
}


  • Step 3: After Pasting Above Code Click On Save Button
  • Step 4: Now according to you need paste the following code where you want to place this widget. For Example Layout >> Add a Gadget >> Edit HTML/JavaScript.

<div class="lordbuttons">
<ul class="nav-tt">
<li><a class="twitter" href="#" target="_blank"><span>Twitter</span></a></li>
<li><a class="gplus" href="#" target="_blank"><span>Google Plus</span></a></li>
<li><a class="facebook" href="#" target="_blank"><span>Facebook</span></a></li>
<li><a class="linkedin" href="#" target="_blank"><span>LinkedIn</span></a></li>
<li><a class="tumblr" href="#" target="_blank"><span>Tumblr</span></a></li>
<li><a class="pinterest" href="#" target="_blank"><span>Pinterest</span></a></li>
<li><a class="youtube" href="#" target="_blank"><span>Youtube</span></a></li>
<li><a class="mail" href="#" target="_blank"><span>Mail</span></a></li>
<li><a class="rss" href="#" target="_blank"><span>RSS</span></a></li>
</ul></div>

  • After Adding This Code Replace # with Social Media Page Or Profile Link.
  • Finally After Customizing It Click on Save Button Enjoy!!
Read More...