Showing posts with label blogger tricks. Show all posts

Friday, February 1, 2013

Add Facebook Like Button To Blogger Posts


As we all know facebook is one of the largest social media company in the word.If your blog have any fan page then it will help you a lot in increasing traffic on your blog.We already shared all types of twitter tweet buttons and here also we are giving all types of facebook like buttons.i.e. vertical count,horizontal count and without count.You can add this button just below of of post tile and below of the post.Just follow my instructions carefully....

Note - This button will not like your fan page it will like and share your post

How To Add Facebook Like Button To Blogger Posts?


  1. Go to Blogger Dashboard > Design > Edit HTML
  2. First take a backup of your template
  3. Tick  the expand widget check box
  4. Find for below code in your template


<data:post.body/>

If you wish to add like button just below of post title the add the below code just before of<data:post.body/>

and if you wish to add this like button just below of your post then add below code just below of <data:post.body/>

Facebook Like Button Styles


You can add like button in three styles :
  1. Vertical Count
  2. Horizontal Count
  3. Without Count

1. Vertical Count


<b:if cond='data:blog.pageType != &quot;static_page&quot;'> <iframe allowTransparency='true' expr:src='&quot;http://www.facebook.com/plugins/like.php?href=&quot; + data:post.canonicalUrl + &quot;&amp;send=false&amp;layout=box_count&amp;show_faces=false&amp;width=55&amp;action=like&amp;font=arial&amp;colorscheme=light&amp;height=62&quot;' frameborder='0' scrolling='no' style='border:none; overflow:hidden; width:55px; height:62px;'/> </b:if>

2. Horizontal Count


<b:if cond='data:blog.pageType != &quot;static_page&quot;'> <iframe allowTransparency='true' expr:src='&quot;http://www.facebook.com/plugins/like.php?href=&quot; + data:post.canonicalUrl + &quot;&amp;send=false&amp;layout=button_count&amp;show_faces=false&amp;width=90&amp;action=like&amp;font=arial&amp;colorscheme=light&amp;height=21&quot;' frameborder='0' scrolling='no' style='border:none; overflow:hidden; width:90px; height:21px;'/> </b:if>

3. Without Count


<b:if cond='data:blog.pageType != &quot;static_page&quot;'> <iframe allowTransparency='true' expr:src='&quot;http://www.facebook.com/plugins/like.php?href=&quot; + data:post.canonicalUrl + &quot;&amp;send=false&amp;layout=standard&amp;show_faces=false&amp;width=450&amp;action=like&amp;font=arial&amp;colorscheme=light&amp;height=35&quot;' frameborder='0' scrolling='no' style='border:none; overflow:hidden; width:450px; height:35px;'/> </b:if>

If you faced any problem, please do not hesitate to let me know. :)


Read More...

Sunday, January 27, 2013

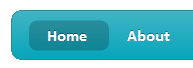
Fancy CSS3 & jQuery Lavalamp Menu For Blogger


You can use this menu in 6 colors by just changing a word in the HTML code.This menu is designed by Insidesigns and I have bloggerized it to works perfectly with any blogger blog.Now lets go to the tutorial and see how to add this menu to blogger blog.

How To Add This Menu TO Blogger?

For easy understanding I am dividing the tutorial in three parts & they are as below,
  1. Adding Scripts
  2. Adding  Styles
  3. Adding The Menu

1. Adding Scripts

  1. Go to Blogger Dashboard > Template
  2. Click on Edit HTML
  3. Hit Proceed
  4. Find below code in your template

</head>

add below code just above it,(If you have already added a jQuery library to your blog then delete the highlighted code)

<script src="http://ajax.googleapis.com/ajax/libs/jquery/1.7.2/jquery.min.js" type="text/javascript"></script>
<script src="http://code.helperblogger.com/lavalamp-menu.js" type="text/javascript"></script>

2. Adding Styles


Now find below code,

]]></b:skin>


add below CSS code immediately before it,

/*LAVALAMP MENU BY http://www.styleupyourblog.blogspot.com/ START*/

.lavalamp {
    position: relative;
    border: 1px solid #d6d6d6;
    background: #fff;
    padding: 15px;
    -webkit-box-shadow: 0 3px 6px rgba(0,0,0,.25);
 -moz-box-shadow: 0 3px 6px rgba(0,0,0,.25);
    border-radius : 10px;
    -moz-border-radius : 10px;
    -webkit-border-radius : 10px;
    background : -webkit-gradient(linear, left top, left bottom, from(rgb(240,240,240)), to(rgb(204,204,204)));
    background : -moz-gradient(linear, left top, left bottom, from(rgb(240,240,240)), to(rgb(204,204,204)));
 height: 18px;
        font-family: calibri;
}

.magenta {
 background : rgb(190,64,120);
 background : -webkit-gradient(linear, left top, left bottom, from(rgb(190,64,120)), to(rgb(177,24,91)));
 background : -moz-gradient(linear, left top, left bottom, from(rgb(190,64,120)), to(rgb(177,24,91)));
 border: 1px solid #841144;
 
}

.cyan {
 background : rgb(64,181,197);
 background : -webkit-gradient(linear, left top, left bottom, from(rgb(64,181,197)), to(rgb(7,165,187)));
 background : -moz-gradient(linear, left top, left bottom, from(rgb(64,181,197)), to(rgb(7,165,187)));
 border: 1px solid #2f8893;
 
}

.yellow {
 background : rgb(255,199,79);
 background : -webkit-gradient(linear, left top, left bottom, from(rgb(255,199,79)), to(rgb(255,188,43)));
 background : -moz-gradient(linear, left top, left bottom, from(rgb(255,199,79)), to(rgb(255,188,43)));
 border: 1px solid #c08c1f;
 
}

.orange {
 background : rgb(255,133,64);
 background : -webkit-gradient(linear, left top, left bottom, from(rgb(255,133,64)), to(rgb(255,107,24)));
 background : -moz-gradient(linear, left top, left bottom, from(rgb(255,133,64)), to(rgb(255,107,24)));
 border: 1px solid #c04f11;
 
}

.dark {
 background : rgb(89,89,89);
 background : -webkit-gradient(linear, left top, left bottom, from(rgb(89,89,89)), to(rgb(54,54,54)));
 background : -moz-gradient(linear, left top, left bottom, from(rgb(89,89,89)), to(rgb(54,54,54)));
 border: 1px solid #272727;
 
}

.magenta li a , .cyan li a, .yellow li a , .orange li a, .dark li a{
 color: #fff;
 text-shadow: 0 -1px 0 rgba(0,0,0,.40);
 
}

.lavalamp a {
    text-decoration: none;
    color: #262626;
    line-height: 20px;
}

.lavalamp ul {
    margin: 0;
    padding: 0;
    z-index: 300;
    position: absolute;
}

.lavalamp ul li {
    list-style: none;
    float:left;

    text-align: center;
    }

.lavalamp ul li a {
    padding: 0 20px;
    text-align: center;
    }

.floatr {
    position: absolute;
    top: 10px;
    z-index: 50;
    width: 70px;
    height: 30px;
    border-radius : 8px;
    -moz-border-radius : 8px;
    -webkit-border-radius : 8px;
    background : rgba(0,0,0,.20);
    -webkit-transition: all .4s ease-in-out;
    -moz-transition: all .4s ease-in-out;
}

/*LAVALAMP MENU BY http://www.styleupyourblog.blogspot.com/ END*/


Now save your template.

3. Adding The Menu


Now come to Page Layout

  • Now come to Page Layout
  • Click on Add a Gadget (Below Header)
  • Choose HTML/JavaScript
  • Copy and paste below code inside it,

<div class="lavalamp dark">
 <ul>
  <li class="active"><a href="">Home</a></li>
  <li><a href="#">About</a></li>
  <li><a href="#">Blog</a></li>
  <li><a href="#">Services</a></li>
  <li><a href="#">Portfolio</a></li>
  <li><a href="#">Contacts</a></li>
  <li><a href="#">Back to Article</a></li>
  <li><<a href="#">How it Works?</a></li>
 </ul>
 <div class="floatr"></div>
</div>

  • Replace # with the links
  • Replace Home,About,Blog. etc. with your link text which you want to appear on the menu.
  • If you want to change background color of the menu then replace <div class="lavalamp dark"> with one of the code below.


<div class="lavalamp">
<div class="lavalamp magenta">
<div class="lavalamp cyan">
<div class="lavalamp yellow">
<div class="lavalamp orange">
<div class="lavalamp dark">

Finally save your widget and you are done.
Read More...

Coll JavaScript Image Slider For Blogger


Today I am sharing another cool slider which works with JavaScript and no jQuery and flash is needed.This slider contains a ribbon at the left top corner of slider and it is named as "What's Hot" also it contains a beautiful slice effect which slices image into 12 parts,these main features increase beauty of the slider.Another great feature of this slider is it is highly
Read More...

How To Remove Navbar From Blogger


Navbar-Navbar is inbuilt in all blogger templates.Navbar is a bar on top of the blog it has many usefull things like-search,share and follow.

If you want to remove Navbar then there is no potion is there in blogger to remove navbar directly.So how to remove navbar a big question come in our mind.
Read More...

How To Add Social Media Buttons With Css3 Effect To Blogger


Social Media is always helpful to blogger, even one like or share can drive traffic to your blog, you should serve your visitors social sharing and follow us button by which they can stay connected with your blog. If your social sharing option is attractive then user love to share your blog. In this post I will provide you attractive social media follow us button with css3 tooltip effect.


Adding This Widget To Blogger


The steps are extremely straightforward, and would merely take 5 minutes to complete the integration. Just follow the steps as mention below.

  • Step 1: Go to Blogger Dashboard >> Template >> Edit HTML >> Proceed
  • Step 2: Now within the template search for ]]></b:skin> and just above it paste the following Style sheet CSS Code.

.nav-tt{
 padding: 50;
 width: 70%;
 height: 70px;
 margin: 80px auto 30px auto;
}
.nav-tt li{
 float: left;
 list-style: none;
}
.nav-tt li a{
    display: block;
    width: 40px;
    height: 40px;
    margin: 0 2px;
    outline: none;
 position: relative;
 z-index: 2;
    text-indent: -9000px;
    text-decoration: none;
}
.nav-tt li .gplus{
    background: url(https://blogger.googleusercontent.com/img/b/R29vZ2xl/AVvXsEi-vqyM7ezMO6kAbC3ms4fEUVqPwX0iM8Qrlb5Yn5g8cLzozMT4O-S4Judu9KRsPDvHtQxHMnxPo0o-WYjfRqkQA_0ktrjLPWEI7dIK0guYbQQl1yH_hwhVCC58Ms2263Twp0NUfyOH_3z_/s128/google_plus.png) no-repeat;
}
.nav-tt li .twitter{
    background: url(https://blogger.googleusercontent.com/img/b/R29vZ2xl/AVvXsEgQSrpFfPXrYNW32guRteZ61Kz5DJdV-x8iWFsg-gUXqvysTF_zY7KJojdLm0NZe90oMEzlddarh62sWUYyoEPztD8KQXevUgzKhbt5gZc9VJCWsWQPHcPQpt9NsjA_pe9psNBx57EpJs7H/s128/twitter_1.png) no-repeat;
}
.nav-tt li .pinterest{
    background: url(https://blogger.googleusercontent.com/img/b/R29vZ2xl/AVvXsEhXYuJLd_ttZQ5EYGAKryY9b0xPfkSW5Q2b9G6kyUfPgkIM6NJq0-Vn8FUvG50HIQZPee84d1gCEs9xxWDn33mtPm2tuad9KadQuwBeZbDKhRpL7AUSVBE8PFjihqmoKg2hbUEprVfZ_zSo/s128/pinterest.png) no-repeat;
}
.nav-tt li .facebook{
    background: url(https://blogger.googleusercontent.com/img/b/R29vZ2xl/AVvXsEjJyCc4jYBahmelGEitSRmQt2QyuE6W6NDDhIXwynaef9bBzjcZ2vWsp9u1vQPKvCnDHsMFvrtEspA-GA91R5zMGAjlj9KbIY_HZYPlbknbI0564F_7IUE3087Op94gzMbFakd04onC2wai/s128/fb_1.png) no-repeat;
}
.nav-tt li .linkedin{
    background: url(https://blogger.googleusercontent.com/img/b/R29vZ2xl/AVvXsEjT26xhha9-JvozyVBtysqM7DdRA8nAXDpVM8GlII13ZUbydM2nS3oheEF7OK2kse7SQBgbTvewrxE2jWqgAXjIpn4GE6JG8bKR91njps23h6qfWuf6lp6rLEt-6QoUqXr9iy6Pfivr38is/s128/linkedin.png)no-repeat;
}
.nav-tt li .tumblr{
    background: url(https://blogger.googleusercontent.com/img/b/R29vZ2xl/AVvXsEjUQciKfR9po2jCslezhafwhDzNcTeDR2dzMI6-Lm6LYGfVeT5dDbXXrj9WoDn7oK_qQDfAXURDrO1S-RLTzeN4vtLJNFVctNQSnveBzYVInVkFbFaV8O2RDpakzELukNtivSvp8SttYnMz/s128/tumblr.png) no-repeat;
}
.nav-tt li .youtube{
 background: url(https://blogger.googleusercontent.com/img/b/R29vZ2xl/AVvXsEhuCfwWl-Mv4XVLT1uIdPK-5aSwF6IGXoGeDbZcBBUCjWU3XudaXCN3bVXF_ICd_3wWuHK1Uem_4bRcfqiLRkG0cRUkxNaMmAnQOhT9wv85a5Lzy76SwN_1lWROvD3GfgVc4IYshxQCHWRa/s128/you_tube.png) no-repeat;
}
.nav-tt li .mail{
 background: url(https://blogger.googleusercontent.com/img/b/R29vZ2xl/AVvXsEgTaF8L5KMYCSOfsUSkVBAujg_jhNrrhW9sd8cfQr8fQPD3GUanoPRTT7bJ14RmKJJXaOh1BUlMX9OnK21LW2JupcY4ha265AzktujA54eUtLJdwfvRugh5gxA-vKRTI3CmHdNDIINkzW5g/s32/email.png) no-repeat;
}
.nav-tt li .rss{
 background: url(https://blogger.googleusercontent.com/img/b/R29vZ2xl/AVvXsEi53P3hyphenhyphen4kwzJrg7adJa1AtLzOxs_dugNaSUFz82aJECZZuqmHIldBlrGNXkpajN9POpswjA8OMBU1k2egLW4UeD4g3nFKnK6mPnd3H_3pnhb8naCSq_CfH4TU004uvXhsPTAJNracgw3uX/s128/rss.png) no-repeat;
}
.nav-tt li a span{
 width: 80px;
 height: 80px;
 line-height: 80px;
 padding: 10px;
 left: 50%;
 margin-left: -60px;
 font-family: 'Alegreya SC', Georgia, serif;
 font-weight: 400;
 font-style: italic;
 font-size: 14px;
 color: #719DAB;
 text-shadow: 1px 1px 1px rgba(0, 0, 0, 0.1);
 text-align: center;
 border: 5px solid #ffffff;
 background: rgba(255,255,255,0.5);
 text-indent: 0px;
 position: absolute;
 pointer-events: none;
 border-radius: 50%;
 bottom: -40px;
 opacity: 0;
 box-shadow: 0px 0px 10px 0px rgba(0,0,0,0.1);
 -webkit-transform: scale(0);
 -moz-transform: scale(0);
 -o-transform: scale(0);
 -ms-transform: scale(0);
 transform: scale(0);
 -webkit-transition: all 0.3s ease-in-out;
 -moz-transition: all 0.3s ease-in-out;
 -o-transition: all 0.3s ease-in-out;
 -ms-transition: all 0.3s ease-in-out;
 transition: all 0.3s ease-in-out;
}
.nav-tt li a span:before,
.nav-tt li a span:after{
 content: '';
 position: absolute;
 bottom: -15px;
 left: 50%;
 margin-left: -9px;
 width: 0;
 height: 0;
 border-left: 10px solid transparent;
 border-right: 10px solid transparent;
 border-top: 11px solid rgba(0,0,0,0.1);
}
.nav-tt li a span:after{
 bottom: -13px;
 margin-left: -10px;
 border-top: 10px solid #ffffff;
}
.nav-tt li a:hover span{
 opacity: 0.9;
 bottom: 50px;
 -webkit-transform: scale(1);
 -moz-transform: scale(1);
 -o-transform: scale(1);
 -ms-transform: scale(1);
 transform: scale(1);
}


  • Step 3: After Pasting Above Code Click On Save Button
  • Step 4: Now according to you need paste the following code where you want to place this widget. For Example Layout >> Add a Gadget >> Edit HTML/JavaScript.

<div class="lordbuttons">
<ul class="nav-tt">
<li><a class="twitter" href="#" target="_blank"><span>Twitter</span></a></li>
<li><a class="gplus" href="#" target="_blank"><span>Google Plus</span></a></li>
<li><a class="facebook" href="#" target="_blank"><span>Facebook</span></a></li>
<li><a class="linkedin" href="#" target="_blank"><span>LinkedIn</span></a></li>
<li><a class="tumblr" href="#" target="_blank"><span>Tumblr</span></a></li>
<li><a class="pinterest" href="#" target="_blank"><span>Pinterest</span></a></li>
<li><a class="youtube" href="#" target="_blank"><span>Youtube</span></a></li>
<li><a class="mail" href="#" target="_blank"><span>Mail</span></a></li>
<li><a class="rss" href="#" target="_blank"><span>RSS</span></a></li>
</ul></div>

  • After Adding This Code Replace # with Social Media Page Or Profile Link.
  • Finally After Customizing It Click on Save Button Enjoy!!
Read More...